How to create a Virtual Tour and add a Hotspot to a 360 Image.
Adding hotspots to 360 images is a main action you will be doing when creating virtual tours. When putting a hotspot into a 360 image you will be using two basic type of hotspots:
- Link to another Scene (change viewers position to a different location)
- Popping up a piece of media (video, image, another 360 image) — Viewer stays on the current 360 image but is shown additional content on top of the 360 image.
You create and manage all of the hotspots inside of Scene Manager. When you are ready to add hotspots to 360 images you will need to create a Scene for the image. Once the scene is created you will be adding the hotspots onto the Scene.
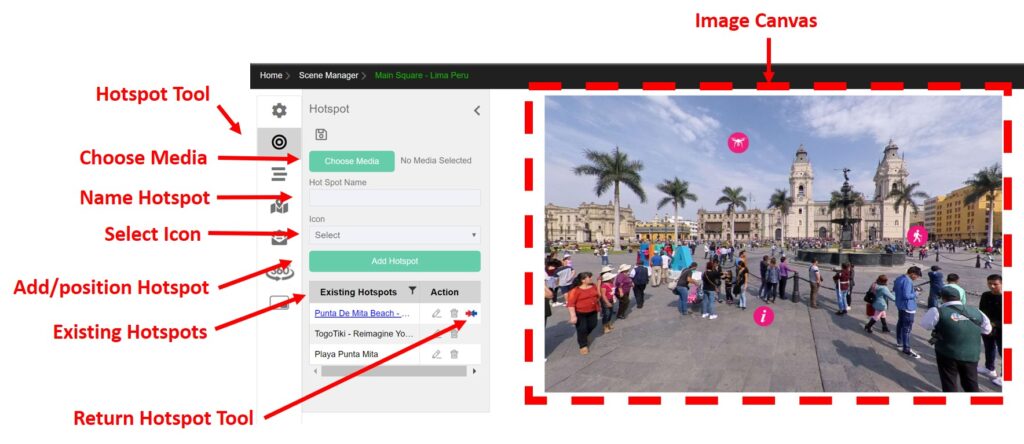
The image below shows the components of the Hotspot tool inside of Scene Manager.

Inside of Scene Manager > Hotspot there 5 basic steps to adding a hotspot onto a 360 image:
- Select the Scene or Media for your hotspot
- Select a Scene
- Select a File (video, 360, image)
- Name Hotspot – this will appear as the mouse over message on your 360 image
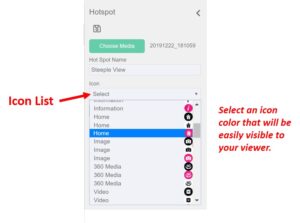
- Pick the Icon you want to use
- Position the Hotspot onto the canvas (where on image to place icon)
- Save
You can repeat these steps for each of the hotspots you need in a 360 image. When you create a Scene type hotspot (linking one scene to another scene) you can have an additional option to create a Return Hotspot. This is a real time saver and helps keep your tour organized. It automatically jumps you to the other Scene to create a Return Hotspot.
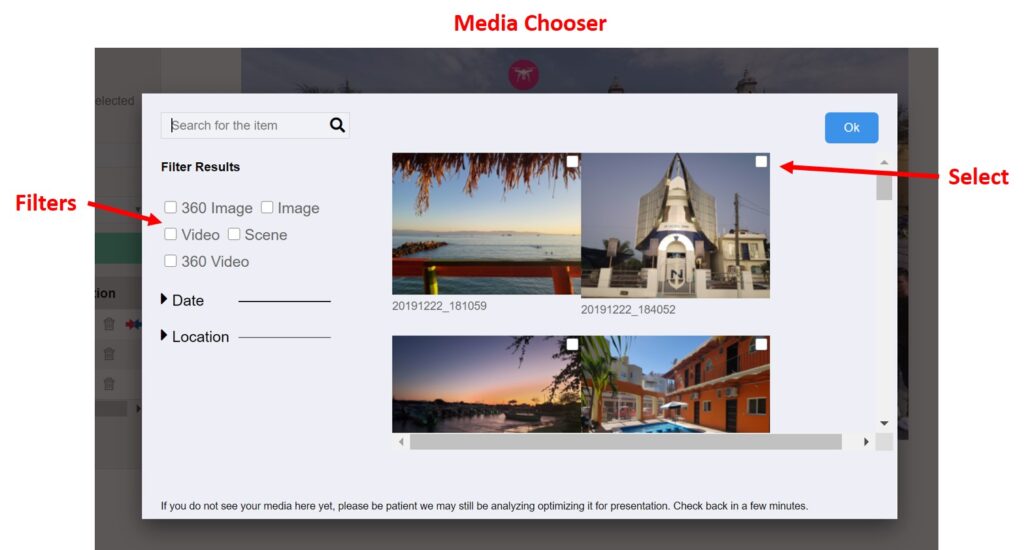
Step 1 – Select the Scene or Media for your Hotspot hit the Choose Media button.
You will be given the media chooser control to select your content. You can filter and search for the media or scene that you want to use. Scene can be distinguished from plain media files by the small black badge to the right of their name.


Step 4 – Click on the Add Hotspot button. Then position your mouse over the image canvas area where you want the Hotspot to appear. Right click on the mouse to lock the hotspot onto the desired position.
Step 5 – Save. You can repeat steps 1 to 4 for each hotspot you want to add to your 360 Image.

